
.jpg)
So here is the Aztec coin pouch tutorial:
This Aztec design has been created with a hand cut stencil which is then used to hand screen print using eco friendly ink.
Materials in pack:
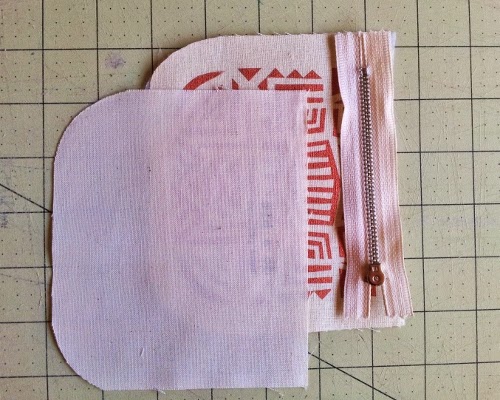
2 x hand printed Aztec fabric - 55% linen and 45% cotton
2 x interfacing
2 x lining fabric - 100% cotton
1 x 10cm metal zip
1 x grosgrain ribbon for zip pull
.jpg)
What you will need:
- sewing Machine - zipper foot
and zig zag/general foot
- off white cotton thread
- scissors
- pins
- iron
Step 1:
Iron (low heat) interfacing with the rough side down on to the back of the hand printed fabric.
This will give the fabric a bit more weight.

Step 2:
Place one piece of printed fabric on the table face up - then place the zip - top side down on the top edge of the fabric. Then place the lining fabric (do a bit) facing down on the edge of the fabric.
My lovely Mother -in-law likes to call this a "zip sandwich"! :)
Step 3:
Using the zipper foot - sew along the edge close to the zip. You will need to unzip the zip once you are about halfway and continue sewing.

Step 4:
Repeat step 2 and 3 for the other side of the zip.

- Try to line up the pattern as below

Step 5:
Using the iron, press both sides of the fabric so the zip seams are nice and flat.
Trim any loose threads.

Step 6:
Open the zip ¾ of the way - this is important because if you don't you won't be able to turn the pouch inside out when it's finished! It can be a major disaster!
.jpg)
Step 7:
Place the hand printed fabric right sides together and do the same with the lining fabric - pin together.
Tip: hold pattern side together, up to the light, to match the pattern up.

Step 8:
Using the zigzag/ general foot - sew together around the edge, leaving a gap at the bottom of the lining fabric.
Tip: to make sure that you are sewing around the pattern side equally (curves can be a challenge to sew) Hold pinned pattern side up against the light of a window - use a tailors chalk or pencil to lightly trace the edge of the pattern... this will help when you are sewing :)

Step 9:
Cut a few notches around curved parts of the pouch - this will create a smoother curve once turned inside out. (you can use pinking shears for this too)

Step 10:
Turn pouch inside out through the opening and then hand stitch the opening closed.

Step 11:
Press the pouch with a warm iron and then add ribbon to the zip.

Woo hoo… you have a lovely new little coin pouch!

Enjoy! xxx